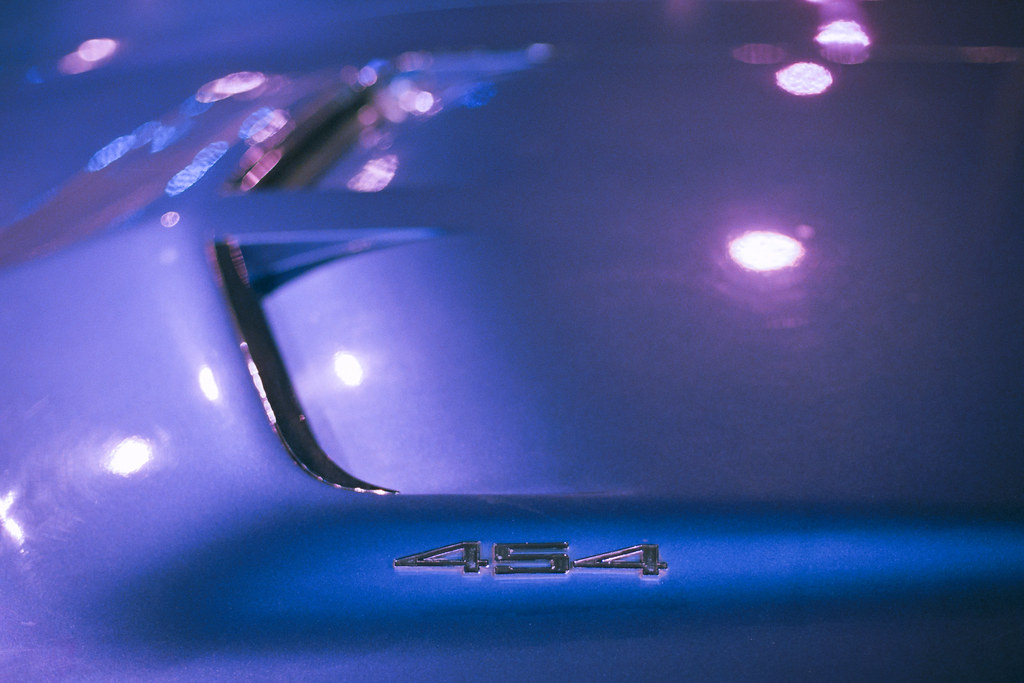
It's a big block Stingray Corvette. But then, if you know what one looks like you knew that...
This is a personal photography blog. It is a showcase for some of my favourite shots. I mainly shoot things around my environment in Doha, Qatar. I'm a mainly Nikon shooter and very fond of film and my F4.

Slide film has always been admired for the impact it delivers. You take the shot - wham! A final result pops straight out of the development tank. Pop it in a viewer or projector and you are instantly transported to the scene where you took the photo!
Negative film is a lot like a digital RAW file. The potential is there to make a number of different artistic interpretations of the scene you photographed but more work is left to you, the artist. Give the same RAW file to three different people and they will hand back three different JPEGs. The same goes for three scans of the same colour negative. And unlike slide film there is no "original" to hold up to a window and argue with the scanner operator about regarding accuracy of colour, contrast, etc...
So, who would want to shoot this beast we call colour negative film? Only people who:
So, how do we tame this beast?
Let's say that although you want creative control you don't want to be dealing with a pile of jelly. Let's say that you are after some measure of control over how your negative film gets translated into a positive. What are your choices for solid "known starting points"?
Here are your main choices:
If there is one aspect of colour negative film that strikes fear and uncertainty into the heart of (almost) every photographer it is that weird orange mask. Yes, the film clearly contains the inverse information of the scene. Bright is dark, yellow is blue and so forth. So far, this is like black and white negative film and easy to understand. However, with the addition of the orange mask the film becomes something that is very difficult to evaluate with the naked eye on a lightbox. Why, oh why oh why do they do that?
Well, the best explanation I have ever read is here. However, every time I read that I understand it. A day later, however, I can never remember. Let me give you the big takeaway that will dispell a lot of needless confusion about negative film: THE MASK IS THERE TO ENSURE EVEN COLOUR BALANCE WHEN PRINTED OPTICALLY.
Confusion often leads to magical thinking and unfortunately you will see a lot of that in relation to different methods for scanning colour negatives. If you are confused about the fundamentals you will never feel sure about the reasons for your methods.
What this tells us is that when we scan, the red channel is the strongest colour on the film. Some in the dyes, some in the mask. The green channel will be less strong and the blue channel will be weakest.
Although we see the three colour channels at quite different strengths (and although this ratio varies from one emulsion to another) the film is designed so that if the exposures for all three channels are equalised then the final "print" will have a correct colour balance. For "print" you can read "scan".
The traditional way of doing this would have been to illuminate the print paper through the film using three primary colour lamps and varying the time for each primary to acheive a nuetral colour balance. If you took an unexposed frame and varied the exposure of each primary lamp source until it printed grey on your colour paper you would have found this ratio. If you used this ratio to print any frame on this roll that actually had an image you would expect true colour from that frame on your print.
So what needs to happen at the scanner level is for the ratio of the three primaries to be determined, the necessary exposure to be determined and the exposures set appropriately to capture as much detail as possible for each primary channel. This is the place where things often go wrong for a lot of people. Then channels need to be equalised in exposure, inverted and applied a gamma value (since the scanner sees in linear vs. photographic paper or our eyes seeing in log).
Typically the "negative film" option of scanner software guesses at this balance rather than measuring a piece of unexposed film since there typically isn't necessarily unexposed film in the selected scan area and the software takes a "frame-by-frame" view of the world. Instead, the software will look at the actual colour curves in the image and "guess" at the probable endpoints. In 95% of images this can work great. However, it also explains why two frames of the same subject on the same strip can come out with different casts when scanned this way.
The other way this can go wrong (depending on the software) is the clipping that can occur when the guesses at the endpoints are not conservative enough. A lot of software is notorious for this but I find that the current version of Nikon Scan (4.0.2) does a very good job most of the time. Vuescan has a feature where you can specify a section of base emulsion and let the software "memorise" the colour and opacity of the mask which allows the colour balance and exposure to be calculated once for a whole roll. This is a great feature but I do find the interface on Vuescan to be a bit of a train wreck so I must admit that although I own Vuescan I don't use it.
With the "positive film" option of the scanner software you make a tradeoff. On the one hand it is very unlikely that the software will clip any of the channels. On the other hand, it is scanning them all with equal exposure giving you an "orange" positive whilst at the same time applying a gamma (the same gamma) to all the (at this point un-equalised) colour channels. What this leaves you with is a rather difficult beast to work with in Photoshop or whatever.
The two biggest problems are that you have thrown away a whole bunch of potential sensor resolution on the two weaker colour channels. In "negative film" mode the scanner software is generally smart enough to equalise the exposure for each channel. In "positive film" mode the channels are assumed to be of equal strength.
In this workflow you would make your scan. You would open the orange-looking scan in Photoshop (or similar) balance the image initially by setting endpoints at each end of each colour channel. You would then invert the image and you would have something close but because the gammas were applied (by the scanner software) before the channels were equalised the gammas are now different for each primary so you would then tweak the colour curve for each channel by eye until the image looked neutral.
This is where I currently find myself and where a lot of others do as well. There are still some pitfalls here.
The first pitfall is working out how to equalise the exposure for the primary colour channels without clipping. The second is working out what method to use to convert the negative image to positive.
So far I have worked with Vuescan, Konica Minolta's scanner software for the Dimage Scan Dual IV and Nikon Scan. All of these programs let you set the gain for each colour channel independently. It may be in different places and called different things (Nikon Scan calls it "analogue gain") but it will be there somewhere. What you want to do is give the green channel about a stop more exposure than the red channel and the blue about half a stop again more than the green. You don't need to get this exact so you can eyeball it from the histograms and the preview. Doing this will ensure you get the scanner's full dynamic range on all three colours. The exposure difference is actually done by the scanner exposing the film to the different colours for longer or shorter durations during the scan. Just like in optical printing!
When you are doing this you will want enough exposure to come close to white in the brightest portions but leave yourself some buffer. You don't want to clip. In Nikon Scan if you leave the "Master Gain" set to zero and use "Auto Expose" the software should keep you from any clipping.
ColorPerfect make an extremely good product with only a few drawbacks. One is that it works as a plugin for Photoshop. If you don't have Photoshop and can't afford it (like me) then it also can be used with another image editor called PhotoLine which works with some Photoshop plugins.
ColorPerfect is capable of some very advanced image processing but the interface certainly takes some getting used to. I struggled for some time with the default conversions which often looked great but seemed much grainier than the results from Nikon Scan's "negative film" mode. I found that I was a bit happier after I made the black and white point thresholds more conservative. ColorPerfect has presets for just about every film emulsion, even modern ones. For example, they currently have a preset for the new Protra 400.
negfix8 is a fairly simple bash shell script that uses the free ImageMagik libraries and is what I currently use. Unlike ColorPerfect the script has only one purpose and that is to find the correct endpoints for all three colour channels and the invert it and set an initial gamma. It also normalises the result making it a suitable source image for further processing. All of the other options basically have a goal of producing a near final image. I like the conservative and consistent result of the negfix8 script which in essence resembles optical printing in its simplicity.
In researching for this article I ended up doing some comparitave conversions on some difficult images. In the process I learned a bit more about the comparative merits of these options.
negfix8 is great for just safely converting everything in a batch. It is a script so it is very easy to just point it at a folder full of scans. It won't mess anything up because it is set not to clip and it doesn't try to do anything clever. If you love to do most of your work in Lightroom or Aperture you will really like negfix8. Also, you don't need any other software (apart from the free ImageMagik libraries).
ColorPerfect, however, really can get the best out of the images that it works well with. It is a piece of software you have to watch, however, precisely because it does try to be clever. Watch out, particularly, with low contrast images which it will try to stretch to full contrast. Also watch for images with nothing very dark in them which it will again stretch the contrast on to make the darkest parts black. And the controls are not the easiest to figure out.
Having said all of that ColorPerfect can work real magic with many images. It will give you people that really look like people. It is fantastic at removing colour casts. It will give you a consistent tone right across the image from the shadows to the highlights. The hits you get out of ColorPerfect will be big hits. Just expect to have to learn its quirks.
Oh, and it's a plugin so if you don't have Photoshop you will have to get a program that takes Photoshop plugins. I use a shareware one called PhotoLine.